
Here are some useful tips on how to use the Badge-O-Matic 9000. If you have any issues, you can always use the CONTACT PAGE to get additional support.
Features
- Easy badge provisioning for quick onboarding of new hires
- Send the employee’s first name, last name, and (optional) employee ID number along with the picture
- Options to send via email or directly into a ticket for ServiceDesk Plus via API

Badge-O-Matic Guide
Usage Guide
The app will run on either iPad or iPhone. The camera will ONLY use the rear-view camera and is designed intentionally that way. This is not meant for selfies but should be used by a staff member to collect appropriate employee pictures as well as capturing employee information correctly.
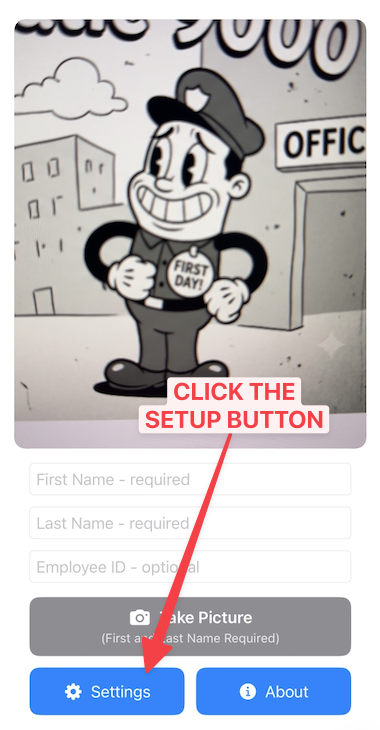
Before we begin using the app, we need to set it up. The application will force you into setup the first time you run it. You can always go back and change settings later if you wish.
Setup
Simple email usage
Sending the image to an email for processing is probably the most simplest form to get this to work. You simply need an email account setup on the device, select email in the settings, and then format your email for sending.
The following fields are required to send email:
- To – The email address you would like to send to. Single email address or multiple emails that are comma separated are supported.
- Subject – The subject line of the email. You can use variables in this field, but the picture {EmployeePicture} variable is not allowed.
- Body – What the body of the email message should contain. This is the only field that supports HTML markup language. This field supports all variables.
- {FirstName} = First Name field from the main screen
- {LastName} = Last Name field from the main screen
- {EmployeeID} = Employee ID field from the main screen
- {EmployeePicture} = Employee picture captured in the main screen
Click Save Settings when complete. Know that you can always come back to this page to update settings later if you choose.
ServiceDesk Plus, API
Sending the data to ServiceDesk Plus via an API call is more complex, but very rewarding if you are using ServiceDesk Plus as a ticket system. You’ll need to have an account that will authenticate and send in tickets, API settings from ServiceDesk Plus, and some additional info such as your site name, group name, and then how you want the ticket formatted.
ServiceDesk Plus, Cloud Hosted is currently tested and supported. The on-prem version of ServiceDesk Plus may work, but it has not been tested and is not officially supported.
ServiceDesk Plus will take some setup to get operational, but is totally doable… you got this! You are going to need:
- ServiceDesk Plus, Cloud Hosted. On-prem may work, but is untested and unsupported.
- Technician account with access to create Mobile-based Application API keys.
- Some time set aside for testing… a drink wouldn’t hurt.
First, log into your Zoho API (https://api-console.zoho.com/) and create a Mobile-based Application API key set.
- Client Name = Whatever you like to call it. I called mine, Badge-O-Matic 9000
- Homepage URL = Again, your call but I put in https://thing27.com
- Authorized Redirect URIs = this one must be set to badgeomatic://oauth-callback
Once that is complete, you should be presented with a Client ID and Client Secret. Log those into a secure password vault for later.
Back in the app, open your settings option. Select ServiceDesk Plus API:
- ServiceDesk Plus API Base URL (required) = Consult with your admin for your specific URL, but the default is something like https://sdpondemand.manageengine.com/app/itdesk/api/v3
- ServiceDesk Plus Authorization URL (required) = again, you must consult your specific instance but this is typically something like https://accounts.zoho.com/oauth/v2/token
- ServiceDesk Plus Mobile-Based Applications Client ID (required) = this is where you apply your Client ID that you generated earlier
- ServiceDesk Plus Mobile-Based Applications Client Secret (required) = this is where you apply your Client Secret that you generated earlier.
Now click the Sign In with Zoho / ManageEngine button to authorize it. This should be the same account you used to create the APIs.
If everything was successful with the previous steps, then you are ready to configure your badges to send to ServiceDesk as a ticket. Congrats! Now is where the fun begins.
- Template Name (optional) = If you have a template in ServiceDesk Plus that you created specifically for badge requests, you may enter the name here exactly how it is listed in ServiceDesk Plus.
- Group Name (optional) = If you want the requests to go to a specific team in ServiceDesk Plus, enter the name of the group. This must match exactly what you have listed in ServiceDesk Plus.
- Site Name (optional) = Again, get with your admin for specifics on this one. If you leave it blank, it will send to your default site.
- Subject Line (required) = You can use free text and variables, but you may not use {EmployeePicture} in this field.
- Description (required) = You can use HTML markup and variables, but you cannot use {EmployeePicture} in this field. At this time, inline embedding of the image is not supported. You can only attach the picture.
- Attachment Filename (required) = The name of the attachment to the request. You can use uppercase, lowercase, numbers, the “-” and the “_” symbols, along with the variables (excluding {EmployeePicture}). The file will be appended with .jpg automatically.
Once complete, click Save Settings and you’ll be returned to the application.
Enough setup, let’s take a picture!
- Enter the First Name and Last Name since they are the only required fields here. Employee ID is optional.
- When all required data is entered, the Take Picture button will change from GREY to BLUE.


- Click the Take Picture button. This will prepare the screen for full view (removing the keyboard so you can capture a nice smile).
- The button will change again to “SAY CHEESE”. It is now ready to take a picture. Press the button again to go to the preview screen.
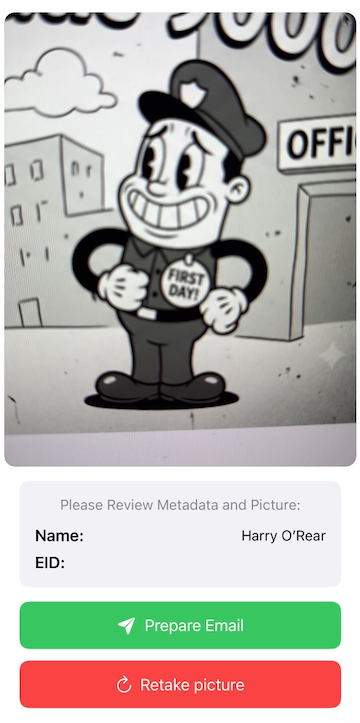
- At this screen, you have the option to submit your data (via either email or ServiceDesk Plus, depending on how you have the app setup).
- If you don’t like your picture or want to change the First Name, Last Name, Employee ID data, simply select Retake Picture to be returned to the previous screen.
CONGRATS!!!!
You just took your first picture!